```html
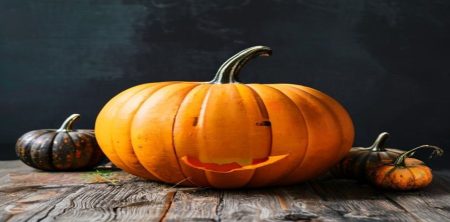
As the leaves begin to turn and the air cools, many of us start to think about how to bring the spirit of fall into our homes. One of the most iconic symbols of the season is the pumpkin, and what better way to celebrate autumn than with DIY projects? In this article, we’ll explore 15 fantastic DIY wood pumpkin tutorials that will not only add charm to your decor but also allow you to unleash your creativity.
1. Rustic Wooden Pumpkins
To kick off our list, let’s talk about rustic wooden pumpkins. This tutorial is perfect for anyone looking to add a farmhouse touch to their autumn decor. You’ll need some scrap wood, a saw, and your choice of paint or stain.
Start by cutting your wood into various pumpkin shapes. You can create three-dimensional pumpkins or flat ones, depending on your preference. After assembling your pumpkins, paint them in warm autumnal colors like orange, brown, and green. For a more rustic vibe, consider leaving the edges raw or distressing them using sandpaper.
2. Painted Pallet Pumpkins
Pallet wood is a versatile material that's perfect for crafting fun decorations. For painted pallet pumpkins, you’ll need old pallets, some paint, and a little creativity. Begin by dismantling the pallet and cutting the boards into pumpkin shapes. There's a fuller look at top wood pumpkin ideas.
Once you have your pumpkin shapes, paint them using vibrant colors. You might want to try a unique technique such as ombre or sponge painting for a textured look. Add a wooden stem and some leaves made from felt or fabric to complete the look. These painted pallet pumpkins are not only budget-friendly but also incredibly eye-catching!
3. Stacked Wood Pumpkins
If you want to create a statement piece for your porch or garden, consider making stacked wood pumpkins. This project involves crafting several wooden pumpkins of different sizes and stacking them on top of each other.
To make the stack, cut each pumpkin from plywood or MDF, then paint each layer in different colors. You can even decorate them with stencils or embellishments like burlap or twine. Once assembled, these stacked pumpkins will serve as a stunning focal point for your outdoor space.
4. Wood Slice Pumpkins
Wood slices are an excellent medium for your fall crafts, and making wood slice pumpkins is a unique twist. Begin by acquiring some wood slices, either from a craft store or by slicing logs yourself. These will serve as the base of your pumpkins.
Using a hot glue gun, stack smaller slices to form a pumpkin shape. Once assembled, paint your pumpkin in bright colors and use natural materials like twigs for the stem. These wood slice pumpkins are perfect for tabletop decor and are sure to impress your guests!
5. Whimsical Pumpkin Family
Why stop at just one pumpkin when you can create a whole family? This tutorial will guide you through crafting a whimsical pumpkin family comprised of various shapes and sizes. You'll need a variety of wood pieces, some paint, and plenty of imagination.
Make one pumpkin for each family member, using different colors and designs to reflect their personalities. You could even paint faces or add accessories like hats or scarves. This project is great for adding a playful touch to your fall decor.
6. Geometric Pumpkins
For a contemporary take on traditional pumpkins, why not try geometric pumpkins? This tutorial focuses on creating modern shapes that stand out. Using geometric forms such as squares and triangles, cut your wood into unique shapes.
Paint these in bold colors or patterns for a stylish and chic look. These pumpkins can be used as decor in any room, adding a fresh vibe to your autumn aesthetic. They’re perfect for those who prefer a minimalist decor style. (See: Learn more about pumpkins.)
7. Chalkboard Pumpkins
Chalkboard paint is a fun and versatile material for DIY projects. By making chalkboard pumpkins, you can change your messages or designs throughout the season. This tutorial involves painting wooden pumpkins with chalkboard paint.
Once dry, you can write festive messages or draw fun designs using chalk. These pumpkins are not only decorative but functional too, as they can be great for communicating seasonal messages to your family or guests!
8. Felted Wood Pumpkins
Combining the warmth of wood with the softness of felt creates a charming contrast. This tutorial guides you through making felted wood pumpkins that are perfect for indoor decor. Start with wooden bases and then cover them with felt in vibrant fall colors.
Once you’ve wrapped your pumpkins with felt, you can add embellishments like buttons or embroidered details. These pumpkins are soft to the touch and make an inviting addition to your home.
9. LED Light-Up Pumpkins
For a little extra flair, consider creating DIY wood pumpkin tutorials that incorporate LED lights. This fun twist allows you to enjoy your pumpkins even after the sun goes down. Start by crafting hollow wooden pumpkins.
After painting them, insert small LED lights inside. This project not only showcases your craftsmanship but also creates a warm and inviting glow for your outdoor or indoor space during the night.
10. Pumpkin Wall Art
Transform your wall decor with pumpkin wall art! This tutorial allows you to create beautiful wooden pumpkin silhouettes that can hang on your walls. Start by sketching out pumpkin shapes on a piece of wood and then cut them out.
Paint the pumpkins in various autumn colors and hang them on your wall using hooks or string. These pieces will add a delightful autumnal vibe to any room and can be left up through Thanksgiving.
11. Mini Wood Pumpkins
Not all pumpkins need to be large; mini wood pumpkins can be adorable tabletop decorations. This tutorial focuses on creating small pumpkins from leftover wood scraps. Cut the wood into mini pumpkin shapes and paint them in bright colors.
These tiny pumpkins can be used as place settings for dinner parties or as part of a larger fall display. Their small size makes them versatile and easy to incorporate into any space.
12. Pumpkin Door Hanger
A pumpkin door hanger can be a welcoming touch to your home. This DIY project is simple yet impactful. Start by cutting a pumpkin shape from a piece of wood and then decorate it with paint or embellishments.
Add a sturdy rope or ribbon for hanging, and you have a lovely piece of decor that greets guests as they arrive. You can even personalize it with your family's name or a festive message.
13. Colorful Pumpkin Garland
Pumpkin garlands can brighten up any room or outdoor space. This tutorial shows you how to create a colorful pumpkin garland using small wooden pumpkins. Paint your pumpkins in a variety of colors and attach them to twine or string.
Hang the garland across a mantel, doorway, or wall for a festive touch. This decoration is perfect for parties or simply to enjoy throughout the fall season.
14. Natural Wood Pumpkins
For those who appreciate a more organic aesthetic, natural wood pumpkins can be an excellent choice. This tutorial involves using unfinished wood and simply polishing it to enhance its natural beauty. (See: Understanding health and nutrition.)
These rustic pumpkins are perfect for adding a natural element to your decor. Arrange them with other natural materials, such as pinecones or acorns, to create a lovely fall display.
15. Pumpkin Centerpiece
Finally, let’s wrap up our list with a fantastic pumpkin centerpiece. This project can be the star of your dining table during fall gatherings. Use larger wooden pumpkins as the base and surround them with smaller decorative elements like gourds, flowers, or candles.
Choose a color scheme that matches your dining area for a cohesive look. This centerpiece will not only impress your guests but also set a warm, inviting atmosphere for your fall celebrations.
The Benefits of DIY Wood Pumpkin Projects
Engaging in DIY wood pumpkin projects offers numerous benefits that go beyond just creating beautiful decorations. One of the significant advantages is the opportunity for personal expression. Every project can be tailored to suit your individual style, allowing you to incorporate your favorite colors, patterns, and materials. Additionally, crafting these pumpkins provides a chance to bond with family and friends, making it a fun group activity during the fall.
Another key benefit is the economic aspect. DIY projects are often more affordable than purchasing ready-made decorations. By utilizing scrap wood or repurposing existing materials, you can create stunning decor without breaking the bank. This is especially important during the holiday season when expenses can quickly add up. This builds on crafting heartfelt farewells.
Furthermore, engaging in hands-on projects like these has been shown to be therapeutic. The act of creating can reduce stress and promote mindfulness, helping you to unwind and enjoy the moment. Whether you're painting, cutting, or assembling, the focus required can serve as a great distraction from daily stresses.
Expert Tips for Successful DIY Wood Pumpkin Projects
To help you achieve the best results with your DIY wood pumpkin tutorials, consider these expert tips:
- Choose the Right Material: While many projects can be made using various types of wood, select a material that suits your project needs. Plywood is affordable and easy to work with, while hardwood can provide a more polished finish.
- Use Quality Tools: Investing in good quality tools, such as saws, drills, and paintbrushes, can significantly impact the outcome of your project. Sharp tools make cleaner cuts and improve safety.
- Plan Your Design: Before starting, sketch out your design and plan the colors and materials you'll use. This can save you time and help you stay organized throughout the crafting process.
- Test Paints and Stains: If you’re using paint or stain, test it on a scrap piece of wood first. This can help you see how the color looks once dry and ensure it aligns with your vision.
- Seal Your Projects: If your pumpkins will be displayed outdoors, consider applying a sealant or weatherproofing spray to protect them from the elements.
Frequently Asked Questions (FAQ)
What tools do I need to start making DIY wood pumpkins?
Basic tools you'll need include saws (like a jigsaw or table saw), sandpaper for smoothing edges, paintbrushes for applying paint or stain, and a hot glue gun for assembly. Depending on your design, you may also need drill bits, clamps, and a measuring tape.
Can I use non-wood materials for my pumpkin projects?
Absolutely! While wood is the preferred material for these tutorials, you can incorporate other materials like fabric, metal, or even recycled materials. The key is to be creative and experiment with what you have available.
How can I personalize my DIY wood pumpkins?
Personalization can be achieved through various methods, such as painting unique designs, adding monograms, or incorporating family names. You could also use embellishments like ribbons, fabric, or even quotes written with chalk or paint.
Are these projects suitable for kids?
Yes! Many of these DIY projects can be adapted for children. However, adult supervision is recommended, especially when using tools like saws or hot glue guns. You can have kids paint or decorate pre-cut wood pieces to ensure safety while still enjoying the creative process.
How long do DIY wood pumpkins last?
With proper care, your DIY wood pumpkins can last for several seasons. If you use high-quality paint and sealants, they can withstand outdoor conditions. For indoor use, they can become cherished decorations year after year, especially if stored correctly during off-seasons.
What are some creative ways to display my DIY wood pumpkins?
Displaying your pumpkins can be as creative as making them! Consider using them as centerpieces on tables, arranging them on a mantel, or placing them on porch steps. You could also create a pumpkin display on a tiered stand or incorporate them into larger floral arrangements for added flair. (See: Explore fall decoration trends.)
Unique Ideas for DIY Wood Pumpkin Projects
Once you've mastered the basics of creating wooden pumpkins, you might want to explore some unique twists to elevate your projects. Here are a few innovative ideas to get your creativity flowing:
1. Pumpkin Planters
Why not turn your pumpkins into planters? By cutting out the top of a pumpkin and adding a small pot inside, you can create a charming display for seasonal flowers or succulents. Paint or stain the outside, add drainage holes, and you’ll have a unique garden accent that celebrates both fall and nature.
2. Pumpkin Birdhouses
If you’re a bird lover, consider crafting wooden pumpkin birdhouses. Use the pumpkin shape as the base but add a small entry hole and a perch. Paint it in bright colors and hang it in your garden to attract feathered friends while enhancing your outdoor space.
3. Seasonal Quote Pumpkins
Using stencils or vinyl lettering, personalize your pumpkins with seasonal quotes that inspire joy or gratitude. Not only does this add a personal touch, but it also makes great conversation starters during gatherings.
Incorporating Technology Into Your DIY Pumpkin Crafts
As crafting evolves, so does the technology you can incorporate into your DIY projects. Here are some tech-savvy approaches to enhance your wooden pumpkin designs:
1. Using a Laser Cutter
If you have access to a laser cutter, you can create intricate designs that would be difficult to replicate by hand. This allows for detailed engravings or unique shapes that can set your pumpkins apart from the rest. You could etch patterns or even family names onto the pumpkins for a personalized touch.
2. Smart Lighting
Instead of traditional LED lights, consider integrating smart lighting into your pumpkins. Using a smart bulb or programmable LED strip, you can change colors and patterns using an app on your phone. Imagine pumpkins that change color according to the time of day or season!
Community and Seasonal Events
Engaging in DIY wood pumpkin projects can also be a great way to connect with your community. Many towns host fall festivals or craft fairs where you can showcase your work or participate in workshops. These events not only allow you to share your creations but also inspire new ideas and foster friendships with fellow crafters.
Conclusion
These DIY wood pumpkin tutorials offer a range of options for all skill levels and styles. Whether you're looking for rustic charm, modern designs, or whimsical decor, there's a project here for everyone. So grab your tools, get creative, and enjoy the rewarding experience of making your own autumn decorations!
```
Trending Now
Frequently Asked Questions
What materials do I need for DIY wood pumpkins?
To create DIY wood pumpkins, you'll need materials such as scrap wood, a saw, paint or stain, and optional embellishments like felt or fabric for leaves. Common tools include a drill and sandpaper for finishing touches.
How do you make rustic wooden pumpkins?
To make rustic wooden pumpkins, cut scrap wood into various pumpkin shapes. Assemble and paint them in warm autumn colors. For a rustic look, leave edges raw or distress with sandpaper for added texture.
Can I use pallet wood for pumpkin crafts?
Yes, pallet wood is excellent for crafting pumpkins! Dismantle an old pallet, cut the boards into pumpkin shapes, and paint them in vibrant colors. This method is budget-friendly and allows for creative designs.
What is the best way to paint wood pumpkins?
The best way to paint wood pumpkins is by using vibrant acrylic paints. Techniques such as ombre or sponge painting can add texture. Ensure the wood is sanded and primed for a smooth finish before applying paint.
How can I create stacked wood pumpkins?
To create stacked wood pumpkins, cut several pumpkins of different sizes from plywood or MDF. Paint each layer in different colors, then stack them to form a visually striking display for your porch or garden.
What's your take on this? Share your thoughts in the comments below — we read every one.

